Everything About Plants – Care, Tips & Green Inspiration

7 Incredible Steps to Successfully Planting Elephant Ear Bulbs for a Lush Paradise.
Planting elephant ear bulbs transforms any garden space into a vibrant, tropical haven. These magnificent plants
Table of Contents
Planting elephant ear bulbs transforms any garden space into a vibrant, tropical haven. These magnificent plants, known for their colossal, heart-shaped or arrow-shaped leaves, are undisputed statement pieces that command attention and admiration. Whether you envision them as a dramatic focal point, a verdant privacy screen, or simply a touch of exotic beauty on your patio, mastering the art of planting elephant ear bulbs is the foundational step to unlocking their full potential. This comprehensive guide is designed to walk you through every essential detail, ensuring your towering beauties not only survive but truly thrive, becoming the breathtaking centerpiece of your outdoor living space.
From the moment you unwrap your dormant “bulb” to witnessing its colossal leaves unfurl, there’s a quiet satisfaction in nurturing these impressive giants. Despite their grand appearance, the process of planting elephant ear bulbs is surprisingly straightforward, provided you understand their fundamental needs. We’ll delve into the precise techniques and crucial care tips that will guarantee a show-stopping display, making your garden the envy of the neighborhood.
Understanding the Elephant Ear “Bulb”: More Than Meets the Eye
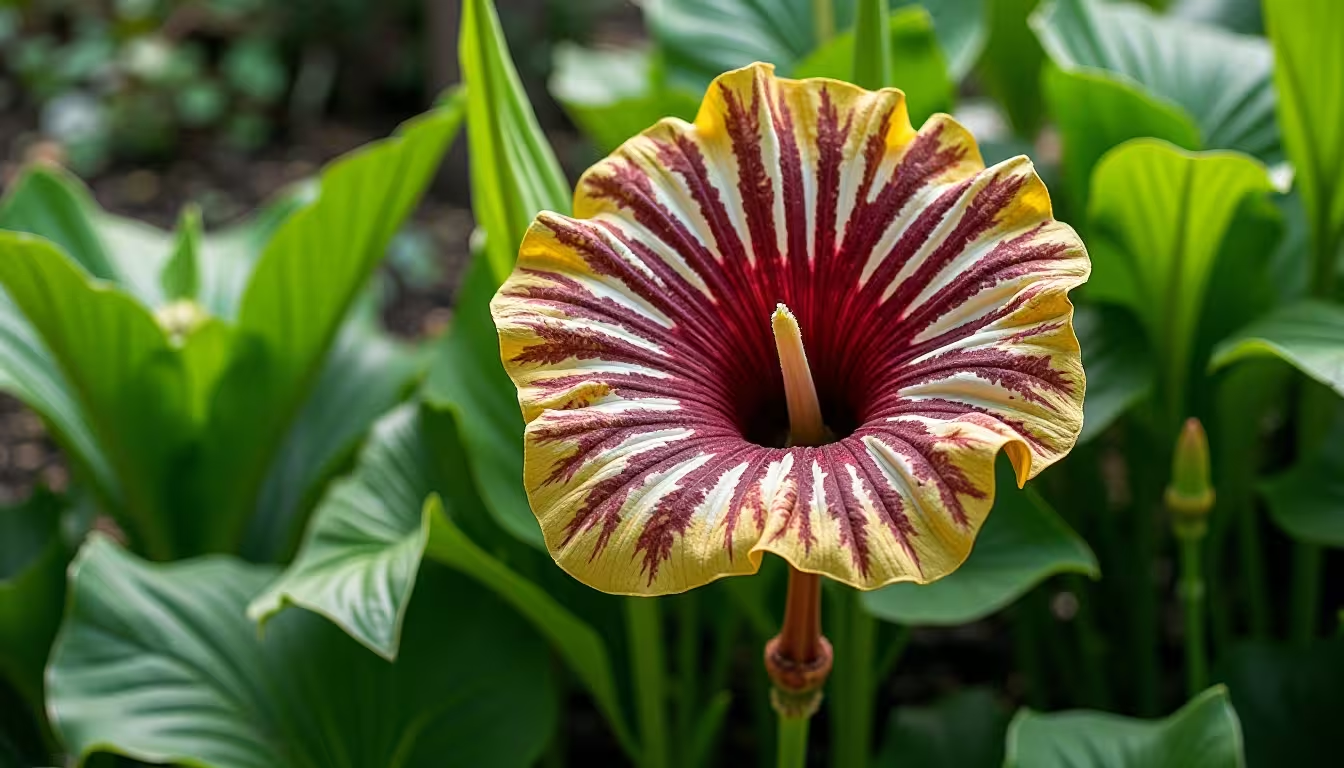
Before we delve into the soil, it’s helpful to clarify what you’re actually planting. While commonly referred to as “bulbs,” most elephant ears are grown from corms or tubers. These are specialized, swollen underground stems designed to store nutrients, allowing the plant to survive dormancy and emerge with vigorous growth. The two most common genera you’ll encounter in garden centers are Colocasia and Alocasia, and understanding their subtle differences can help you fine-tune your planting elephant ear bulbs approach and desired aesthetic. A third, less common ornamental type is Xanthosoma.
Here’s a quick overview of these fascinating “bulbs”:
| Characteristic | Colocasia (e.g., Taro, Black Magic) | Alocasia (e.g., Upright Elephant Ear, Polly) | Xanthosoma (e.g., Tannia, Malanga) |
|---|---|---|---|
| Leaf Orientation | Typically points downwards or outwards, often droopy | Points sharply upwards or outwards | Stiffer, often upward-pointing leaves, less common as ornamentals |
| Leaf Attachment | Petiole (stem) attaches near the center of the leaf (peltate), giving an umbrella shape | Petiole attaches at the edge or margin of the leaf | Petiole attaches at the edge, similar to Alocasia |
| Common Growth Habit | Can spread via underground runners, often forms large clumps | Generally more upright and clumping, individual leaves can be massive | Typically grown for edible tubers in tropical regions |
| Moisture Preference | Thrives in consistently moist to even boggy or shallow water conditions; some are true bog plants | Prefers consistently moist but well-drained soil; dislikes perpetually soggy feet | Similar to Colocasia, often tolerant of wet conditions |
| Overwintering | Often lifted and stored in cold zones due to cold sensitivity | Can sometimes be overwintered as houseplants, still sensitive to frost | Similar to Colocasia, generally needs lifting in cold zones |
While their general care is broadly similar, knowing your variety can help you make minor adjustments, especially regarding water requirements and whether they’re best suited for containers or in-ground boggy areas. For the core process of planting elephant ear bulbs, the instructions remain largely consistent across these types.
The Perfect Moment: When to Begin Planting Elephant Ear Bulbs
Timing is absolutely paramount when it comes to the successful planting elephant ear bulbs. These magnificent plants are undeniably tropical at heart, and they possess a profound aversion to cold. Trying to rush the season can lead to disappointment, as cold soil can cause the corms to rot before they even have a chance to sprout. Patience, in this instance, is not just a virtue but a vital component of your gardening success.
Outdoor Planting: Waiting for Warmth
The golden rule for outdoor planting elephant ear bulbs is to wait until all danger of frost has definitively passed for your specific region. This isn’t just about a single night of freezing temperatures; it’s about the consistent warmth that signals true spring has arrived. More importantly, the soil temperature needs to be reliably warm. Ideally, you want the soil to be consistently reaching at least 65°F (18°C), with many gardeners aiming for 70°F (21°C) for optimal results. Nighttime temperatures should also reliably remain above 50-60°F (10-15°C).
In many temperate climates, this often translates to late spring, typically around late May or early June. However, local conditions can vary significantly. For instance, in regions like Morocco, where summers are intensely hot, you might plant earlier in spring to give the plants a head start before the most extreme heat arrives, ensuring they have time to establish. Conversely, in northern zones, waiting until early June might be essential. Using a soil thermometer is the most accurate way to gauge readiness, taking the guesswork out of the equation. Planting too early into cold, damp soil is one of the most common pitfalls, leading to slow sprouting, stunted growth, or, most tragically, bulb rot.
Starting Early: Indoor Planting Elephant Ear Bulbs
For gardeners residing in cooler zones with shorter growing seasons (generally USDA Hardiness Zones 3-8), starting your planting elephant ear bulbs indoors is an incredibly smart and effective strategy. This method gives your plants a crucial head start, allowing them to develop a robust root system and initial foliage before being transplanted outdoors. This means you get to enjoy their magnificent display much sooner in the season.
- When to Start: Begin this indoor process approximately 4 to 6 weeks before your region’s average last frost date. This timeframe provides ample time for the corms to break dormancy and begin actively growing.
- The Process: Plant your elephant ear corms in individual pots indoors, following the same depth and orientation guidelines you would for outdoor planting. Choose pots that are at least 6-8 inches in diameter to give the roots some initial space.
- Warmth is Key: Place the potted corms in a warm location. Elephant ears absolutely love warmth, and consistent heat is vital for breaking their dormancy and encouraging sprouting. If possible, consider using a heated propagation mat underneath the pots. This provides bottom heat, which greatly accelerates germination and initial growth.
- Light and Moisture: Ensure they receive bright, indirect light. A spot near an east or north-facing window is often ideal. Keep the potting mix consistently moist but avoid making it soggy, as this can still lead to rot even indoors. Once the threat of frost has completely passed and outdoor temperatures are consistently warm, you can gradually acclimate your young elephant ears to outdoor conditions before transplanting them into their final garden spot or larger containers.
Year-Round Growth in Warm Climates: No Need to Rush
For lucky gardeners in warmer USDA Hardiness Zones (typically Zones 9-11), planting elephant ear bulbs often means treating them as perennials. In these frost-free environments, elephant ears can remain in the ground year-round, going dormant in cooler winter months but returning vigorously with the spring warmth. While you can plant them at any time of year in these zones, they will still appreciate the soil warming up in spring for their most dynamic growth cycle.
Site Selection: Crafting the Ideal Home for Your Elephant Ear Bulbs
Choosing the right location is paramount for the health, vigor, and impressive size of your elephant ears. These are not shy plants, and they demand specific conditions concerning space, light, and soil to truly shine and produce their characteristic colossal foliage.
Light Requirements for Optimal Elephant Ear Bulb Growth
Most elephant ear varieties thrive in a location that receives either full sun to partial shade. This translates to roughly 4 to 6 hours of direct sunlight per day, or a spot where they receive dappled light throughout the day, particularly during the intense afternoon hours.
- Full Sun Consideration: Varieties with darker foliage, such as the dramatic ‘Black Magic’ Colocasia, often develop their richest, deepest colors when exposed to more sun. However, in scorching hot climates (like much of Morocco during the summer, where temperatures can soar), intense, direct afternoon sun can sometimes scorch their tender leaves, causing brown, crispy edges. In such scenarios, a spot that provides morning sun followed by protective afternoon shade is often the ideal compromise.
- Partial Shade Preference: Most green-leaved elephant ear varieties, especially those in the Alocasia genus, tend to perform best in partial shade. This typically means they receive bright morning sun but are shielded from the harsh, direct rays of the afternoon sun. This balance prevents leaf burn while still providing enough light for robust growth.
- Indoor Lighting: If you’re starting your planting elephant ear bulbs indoors or overwintering them as houseplants, a location with bright, indirect light is perfect. Think of a spot near an east or north-facing window, where they can receive ample ambient light without being subjected to direct, intense sun that can be magnified by glass.
Soil Matters Most When Planting Elephant Ear Bulbs
The success of your elephant ears hinges significantly on the quality of their soil. These are exceptionally heavy feeders and drinkers, demanding soil that is both rich in nutrients and consistently moist, yet, critically, well-draining to prevent dreaded root rot.
- Richness is Non-Negotiable: The most crucial aspect of soil for planting elephant ear bulbs is its fertility. Elephant ears are voracious eaters, rapidly drawing nutrients from the soil to support their enormous leaves. Therefore, you must incorporate a significant amount of organic matter into your planting area before you even think about putting a bulb in the ground.
- Compost: Well-rotted compost is an excellent choice. It’s a nutrient powerhouse that simultaneously improves soil structure, enhances drainage, and boosts moisture retention.
- Aged Manure: If available, aged manure provides a slow-release source of vital nutrients.
- Peat Moss: Can be used to improve soil structure and acidity if your soil is too alkaline.
- How to Amend: Mix these amendments thoroughly into the top 8 to 12 inches of your garden soil. This deep amendment ensures that the roots, which can spread widely, have consistent access to nutrients and an optimal growing environment. This preparation creates the ideal rich, moisture-retentive, yet well-draining foundation that elephant ears absolutely adore.
- Drainage and Moisture Retention: A Delicate Balance: While elephant ears love moisture, they generally detest soggy “feet” (continuously waterlogged soil). Poor drainage is a leading cause of corm rot. The organic matter you incorporate helps create a balanced soil structure that retains moisture like a sponge while allowing excess water to drain away freely, preventing pooling around the corm.
- Ideal pH Level: Elephant ears generally prefer a slightly acidic to neutral soil pH, ideally in the range of 6.0 to 7.0. If you know your garden soil is particularly alkaline, incorporating acidic organic matter like peat moss or pine bark fines can help lower the pH to a more favorable range.
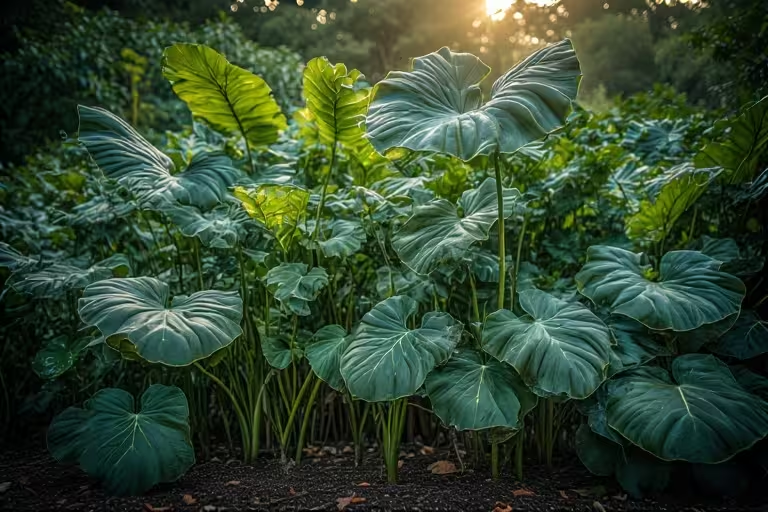
Giving Them Space: Spacing Your Elephant Ear Bulbs
Do not underestimate the mature size of these plants! A single elephant ear, depending on the variety, can grow anywhere from 3 to 8 feet tall and equally as wide, with individual leaves reaching several feet across. When planting elephant ear bulbs in the ground, ensuring they have ample room is vital.
- Ample Spacing: Provide plenty of space for their extensive root systems to spread and for their massive leaves to unfurl without crowding. Overcrowding not only limits air circulation, increasing the risk of fungal diseases, but it also stunts growth, as plants compete for light, water, and nutrients.
- General Guideline: A spacing of 2 to 4 feet between bulbs is a good starting point for most common varieties. However, always check the specific mature size of your chosen variety and adjust accordingly. For the truly giant types, you might even need to allow 5 to 6 feet between plants.
- Visual Impact: Proper spacing also enhances their visual impact, allowing each majestic leaf to stand out and contribute to the overall tropical aesthetic without becoming a tangled mess.
Protection from the Elements: Wind and Weather
While their large, expansive leaves are undoubtedly beautiful, they can also be quite delicate and susceptible to damage from strong winds. Gusts can tear, shred, or even snap stems. Positioning your elephant ears near a wall, a sturdy fence, a dense hedge, or in a more sheltered part of the garden can provide a much-needed windbreak. This small consideration can prevent significant leaf damage and keep your plants looking pristine throughout the growing season.
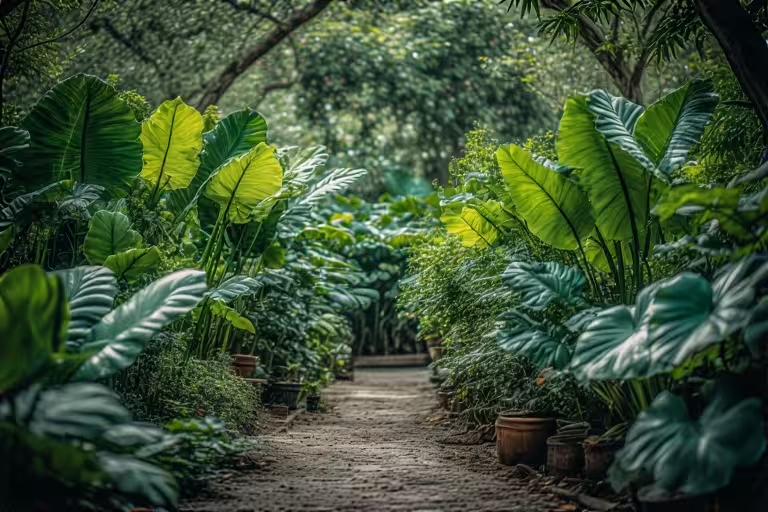
Creative Placement Ideas: Containers, Water Features, and Borders
The versatility of elephant ears allows them to be used in various garden designs, making planting elephant ear bulbs a creative endeavor.
- Container Gardening: This is an excellent option for those with limited garden space, for creating movable focal points on patios or balconies, or for gardeners in colder climates who plan to bring their plants indoors for the winter.
- Pot Size is Key: Choose large containers – think whiskey barrels, half-barrels, or pots at least 18-24 inches in diameter and depth. This size provides ample room for the extensive root system to develop and prevents the plant from becoming root-bound too quickly, which can stunt growth.
- Drainage: Always ensure the pot has ample drainage holes to prevent waterlogging, even for moisture-loving elephant ears.
- Potting Mix: Use a high-quality, well-draining potting mix that is rich in organic matter. You can further enhance it by adding extra compost or perlite for improved fertility and drainage.
- Water Gardens and Ponds: Certain Colocasia varieties are true bog plants and thrive with their roots partially submerged in water or in consistently wet soil at the edge of a pond. This makes them spectacular additions to water features, providing a dramatic, lush backdrop.
- Privacy Screens and Borders: Their broad, dense foliage can create an effective natural privacy screen along property lines, around patios, or to define outdoor living areas. When mass-planted, they form a stunning, verdant border that adds depth and texture to your landscape.
- Entryways and Focal Points: A single, thriving elephant ear in a large, decorative container can make an incredibly dramatic and welcoming statement at your front door, garden entrance, or as a central focal point in a planting bed.
The Planting Ritual: Your 7-Step Guide to Planting Elephant Ear Bulbs
Once you’ve chosen your site and diligently prepared your soil, you’re ready for the exciting, hands-on part of planting elephant ear bulbs. Follow these detailed steps for guaranteed success:
Step 1: Preparing the Ground for Planting Elephant Ear Bulbs
Begin by thoroughly preparing your chosen planting area. Use a garden fork or spade to loosen the soil to a depth of at least 8 to 12 inches. This deep loosening is critical, as it ensures that the elephant ear’s developing root system can easily penetrate the soil, access nutrients, and spread freely. While loosening, take the opportunity to remove any stubborn weeds, chunks of grass, or large stones and debris that could impede root growth or drainage. A clear, loose bed is the first step to healthy growth.
Step 2: Enriching the Soil for Thriving Elephant Ear Bulbs
This is perhaps the most crucial step for the nutrient-hungry elephant ear. Elephant ears are incredibly vigorous growers and demand a rich, fertile environment to produce their characteristic colossal leaves. Generously amend the loosened soil with a significant amount of organic matter.
- Best Amendments: Well-rotted compost is ideal, as it simultaneously improves soil structure, enhances drainage, and boosts fertility. Aged manure also provides a slow-release source of vital nutrients. If your soil is heavy clay, adding perlite or coarse sand (along with compost) can further improve drainage. If it’s too sandy, compost will help it retain more moisture.
- How to Amend: Mix these organic amendments thoroughly into the top 8 to 12 inches of soil that you initially loosened. This deep incorporation ensures that the roots have consistent access to a nutrient-rich, moisture-retentive, yet well-draining environment – the perfect foundation for happy elephant ears.
Step 3: Digging the Perfect Hole for Your Elephant Ear Bulbs
Once your soil is prepared, it’s time to dig the individual planting holes for each elephant ear bulb.
- General Depth: The common guideline for hole depth is 4 to 6 inches.
- Bulb Size Matters: The larger your elephant ear corm or tuber, the deeper the hole should be. For particularly colossal specimens, a full 6-inch deep hole is appropriate to allow for proper coverage and stability.
- Spacing is Key: If planting elephant ear bulbs in groups or rows, remember their mature size and plan your spacing accordingly. As discussed, aim for 12 to 24 inches between smaller varieties, and for the larger, more expansive types, give them a generous 3 to 4 feet of space between each bulb. This prevents overcrowding, ensures good air circulation, and allows each plant to achieve its full, magnificent size without competing too aggressively for resources.
Step 4: Mastering the Orientation for Planting Elephant Ear Bulbs
This is a frequently asked question, and it’s simpler than many gardeners anticipate! Correct orientation ensures the plant expends less energy figuring out which way to grow.
- Pointed Side Up: Most elephant ear corms have a slightly pointed or tapered end. This is typically the “top” of the bulb, where the new leaves will emerge.
- Rough/Gnarly Side Down: The opposite end is usually rougher, flatter, or has distinct root scars. This is the “bottom” that should be positioned facing downwards into the soil.
- “Old Stem” Up: If your corm still has the visible remnants of the previous year’s stem (a small, often circular scar), this end should face upwards.
- Concentric Circles: Sometimes, you might observe a side with visible “concentric circles” or rings; this is another indicator of the top.
- When in Doubt, Plant on its Side: Nature is remarkably resilient and adaptable! If you truly cannot distinguish the top from the bottom, simply plant the bulb horizontally on its side. The plant will instinctively figure out which way is up, sending shoots skyward and roots downwards. It might just take a tiny bit longer for the first sprout to emerge, but it will grow successfully.
Step 5: Achieving the Ideal Depth for Elephant Ear Bulbs
Once the bulb is correctly oriented in the hole, adjust its position so that the top of the bulb is covered by approximately 1 to 2 inches of soil. This depth provides sufficient anchorage and moisture while allowing the new shoot to easily emerge. For very large corms, burying them slightly deeper (e.g., 3-4 inches of soil over the top) is also acceptable and can provide even greater stability.
Step 6: The Crucial First Drink After Planting Elephant Ear Bulbs
Once the bulb is in place, carefully backfill the hole with the prepared, amended soil. Gently tamp down the soil around the bulb to ensure good soil-to-bulb contact and to remove any large air pockets that could dry out the bulb or hinder root development. After the bulb is covered, water the area thoroughly and deeply. This initial soaking is absolutely crucial: it helps settle the soil firmly around the bulb, eliminates remaining air pockets, and provides the necessary moisture to signal the start of its growth cycle, encouraging it to break dormancy.
Step 7: Patience and Marking After Planting Elephant Ear Bulbs
Elephant ears can be notoriously slow to emerge from dormancy after planting elephant ear bulbs. Don’t be alarmed if you don’t see any activity for several weeks. It’s quite common for them to take anywhere from 3 to 8 weeks, and sometimes even longer, to send up their first sprout, especially if soil temperatures fluctuate. To avoid accidentally disturbing the bulb while you await its grand entrance, it’s a very good idea to mark the exact planting location with a small stake, label, or even a decorative garden marker. This helps you remember where they are for future care and prevents you from digging them up prematurely out of curiosity or impatience.
Nurturing Your Tropical Giants: Post-Planting Elephant Ear Bulbs Care
Once your elephant ear bulbs are nestled in the soil and begin to sprout, the journey to magnificent foliage truly begins. Consistent and attentive care is absolutely essential for healthy, vigorous growth, ensuring they reach their full, impressive potential.
Watering Wonders: Keeping Your Elephant Ear Bulbs Thirsty and Happy
Elephant ears are truly moisture-loving plants. They originate from tropical environments, many of which are marshy or receive abundant rainfall. Therefore, they thrive in consistently moist soil.
- Maintain Moisture: The golden rule is to never let the soil dry out completely, especially during their active growing season (spring through early autumn). The most reliable way to check is to feel the top inch or two of soil; if it feels dry to the touch, it’s time to water.
- Frequency and Amount: Watering frequency will vary significantly based on your climate, soil type, and whether the plant is in the ground or a container. In hot, dry climates (like the Moroccan summer, for instance), ground-planted elephant ears might need watering every few days, while container plants can dry out rapidly and may require daily watering. Aim for at least 2 to 3 inches of water per week, either from rainfall or supplemental irrigation.
- Avoid Waterlogging: While they love moisture, most elephant ears (especially Alocasia varieties) do not appreciate perpetually soggy, poorly drained soil. This condition can quickly lead to root and corm rot. Ensure your planting site or container has excellent drainage. Drooping leaves can be an early sign of underwatering, but fortunately, elephant ears are often quick to perk up after a thorough soaking.
Feeding Frenzy: Fertilizing Your Growing Elephant Ear Bulbs
Given their rapid growth and the sheer size of their leaves, elephant ears are exceptionally heavy feeders. Regular fertilization is key to supporting their vigorous development and achieving those awe-inspiring large leaves.
- When to Start: Begin fertilizing once new foliage has actively emerged and the plant has clearly established itself in its new home.
- Fertilizer Type: Use a balanced liquid fertilizer (e.g., a 20-20-20 or similar NPK ratio), or one that is slightly higher in nitrogen (the first number in the NPK ratio) to promote lush, leafy growth.
- Schedule: Apply fertilizer according to the package directions, typically every 2 to 4 weeks throughout the active growing season (from spring through late summer).
- Organic Options: For a more natural and sustained approach, you can also incorporate organic slow-release fertilizers like bloodmeal, bone meal, or a rich compost tea. These options not only provide nutrients but also contribute to overall soil health.
Light Adjustments and Leaf Care for Elephant Ear Bulbs
Keep a close eye on your plants’ response to the sunlight they receive, as this can directly impact their leaf health and color.
- Scorching: If the edges of your elephant ear leaves start to turn brown, become crispy, or look “burnt,” it’s a strong indication that they are receiving too much intense direct sun, especially during the hottest part of the day. If planted in a fixed spot, consider providing some temporary shade during peak afternoon sun, perhaps with a shade cloth. If in containers, simply move them to a shadier location.
- Leggy Growth/Pale Leaves: Conversely, if the stems appear long and stretched (leggy), and the leaves are noticeably smaller or paler than expected, your plant might not be getting enough light. This is more common indoors or in deeply shaded outdoor areas.
- Humidity: As tropical natives, elephant ears truly relish high humidity.
- Outdoors: Outdoor humidity levels are often sufficient, especially in naturally humid climates.
- Indoors: If growing indoors, particularly in dry winter environments with indoor heating, regularly misting the leaves, placing the pot on a pebble tray filled with water (ensuring the pot itself doesn’t sit in the water), or using a room humidifier can significantly benefit the plant, preventing crispy leaf edges.
Pests, Diseases, and Troubleshooting for Elephant Ear Bulbs
While generally robust, like all plants, elephant ears can encounter issues. Vigilance helps address problems quickly.
- Common Pests: Watch out for common garden pests such as spider mites (especially in hot, dry conditions, causing tiny speckles or webbing on leaves), aphids, and mealybugs. A strong spray of water can dislodge many soft-bodied pests, and insecticidal soap can be an effective and relatively safe solution for more persistent infestations.
- Fungal Issues: Overwatering, coupled with poor air circulation, can lead to fungal problems like various leaf spots (e.g., Phyllosticta leaf spot, which produces dark spots on leaves) or, more seriously, root and corm rot. Ensure excellent drainage, avoid overhead watering late in the day (allowing leaves to dry before nightfall), and promptly remove any affected leaves to prevent spread. In severe cases, a fungicide might be necessary.
- Nutrient Deficiencies: Yellowing of older, lower leaves can often indicate a nitrogen deficiency, which can be remedied with a nitrogen-rich fertilizer. Overall paleness or lack of vigor might point to insufficient light or a general nutrient shortage, so re-evaluate your light exposure and fertilization schedule.
- Drooping Leaves: This is most commonly a sign of underwatering. Check the soil moisture, and if dry, provide a thorough drink. Elephant ears are often dramatic, but they tend to perk up quickly once rehydrated.
- Brown/Crispy Edges: Aside from sunburn, this can also indicate inconsistent watering (alternating between too dry and too wet) or low humidity.
Winter Wonders: Overwintering Your Elephant Ears
For gardeners in colder climates where temperatures drop below freezing (typically USDA Zones 3-8), planting elephant ear bulbs outdoors means they will need protection to survive the winter. These plants are not frost-hardy and will perish if left in the ground to freeze. Fortunately, you have a few excellent options for overwintering them to enjoy their magnificent foliage year after year.
When to Lift Your Elephant Ear Bulbs
The ideal time to lift your elephant ear corms is after the first light frost has occurred. A light frost will typically cause the foliage to die back and turn mushy or brown, signaling that the plant is entering dormancy. Do this before a hard, deep freeze sets in, which could damage the corms underground.
Storing Your Elephant Ear Bulbs for Winter
This is the most common method for preserving your elephant ears in cold climates.
- Cut Back Foliage: After the first light frost has blackened the leaves, cut the stems back to about 6 inches above the ground.
- Careful Digging: Gently dig up the corms/tubers. Be very careful not to damage them with your spade or fork, as nicks or cuts can introduce diseases during storage. Try to get as much of the root ball as possible.
- Dry Thoroughly: Once dug up, shake off excess soil. Then, allow the corms to air dry for at least one full day, and ideally up to a week, in a warm, dry, and well-ventilated area. This crucial step helps to “cure” the corm, allowing the outer skin to toughen and seal, which prevents rot during storage.
- Clean and Store: Once thoroughly dry, gently brush off any remaining loose soil. You may also trim off any remaining dried roots. Inspect the corms for any signs of disease or damage; discard any that feel soft or show signs of rot.
- Packing: Wrap each healthy corm individually in newspaper or store them in a paper bag, open crate, or mesh bag. You can also layer them in peat moss, vermiculite, or sawdust to provide insulation and absorb any residual moisture.
- Storage Location: Store the packed corms in a cool, dark, and dry place that consistently maintains temperatures between 50-60°F (10-15°C) and, most importantly, remains above freezing. Basements, unheated closets, or cool garages are often ideal.
- Check Monthly: Periodically check on your stored corms throughout the winter. Look for any signs of shriveling (indicating they are too dry) or, more commonly, rot or mold (indicating conditions are too wet or warm, or there was pre-existing damage). Discard any rotting corms immediately to prevent spread.
Indoor Winter Care for Elephant Ear Bulbs (as Houseplants)
If you’ve grown your elephant ears in pots, or if you prefer to keep some foliage year-round, you can bring them indoors as houseplants.
- Preparation: Before the first hard frost, bring the entire container indoors. You can choose to cut back all but a few of the youngest, healthiest leaves, or even cut all the foliage back to about 6 inches from the soil line if you prefer.
- Location: Place the pot in a bright spot with indirect light.
- Watering: Growth will slow significantly during winter, so reduce watering considerably. Allow the top few inches of soil to dry out completely between waterings. The goal is to keep the plant alive, not actively growing.
- Fertilizing: Cease fertilization during the winter months, as the plant is in a period of reduced activity. Resume feeding in spring when new, vigorous growth begins.
Expanding Your Elephant Ear Family: Propagating Elephant Ear Bulbs
Once you’ve mastered planting elephant ear bulbs and seen them thrive, you might be keen to expand your collection. Elephant ears naturally multiply over time, producing smaller “baby bulbs” (often called cormels) attached to the main corm, or by spreading via underground runners. This makes propagation relatively simple through division.
- Timing: The best time to divide elephant ear tubers is in the fall when the parent plant naturally begins to go dormant (often around the time you’d be lifting them for winter storage), or in the early spring before new growth commences.
- Digging and Cleaning: Carefully dig up the entire parent plant from the ground or remove it from its pot. Gently shake or brush off excess soil to fully expose the corm/tuber and any attached cormels.
- Identifying Divisions: Look for natural separations where smaller tubers or cormels are attached to the main corm. Each section you intend to divide should ideally have at least one “eye” or bud (a growth point where new shoots will emerge), and ideally, some healthy root remnants.
- Sterilize Tools: To prevent the spread of diseases, always use a sharp, clean, and sterilized knife or pruning shears for division. You can sterilize tools by wiping them with rubbing alcohol or a bleach solution.
- Separate: Carefully cut the new tubers or cormels away from the parent plant. The texture is similar to that of a raw potato, making for relatively easy slicing.
- Replanting or Storage: You can immediately plant these newly separated divisions indoors in pots if you want to start them actively growing, or you can store them following the winter care guidelines for spring planting. Ensure they are planted pointed side up (or on their side if unsure) in well-draining soil and watered thoroughly to encourage new root development.
Final Thoughts on Planting Elephant Ear Bulbs: A Journey of Growth
Planting elephant ear bulbs is more than just a garden task; it’s an investment in creating a dynamic, eye-catching landscape. From the initial thrill of selecting the right variety and preparing the perfect planting site, to the patient anticipation of their first sprout, and finally, the awe-inspiring sight of their colossal leaves unfurling, every step of this journey is immensely rewarding.
These magnificent plants, with their sheer size and lush, tropical aesthetic, have an unparalleled ability to transform any space into a dramatic oasis. Whether you’re utilizing them for their striking foliage in a container, their architectural presence in a mixed border, or their natural affinity for water features, their impact is undeniable.
Remember, the key to success with planting elephant ear bulbs lies in understanding and meeting their basic needs: consistent warmth, rich and moist yet well-draining soil, ample light, and diligent watering. With patience, attention to detail, and a little bit of nurturing, your elephant ears will undoubtedly become the crowning glory of your garden or indoor display, inspiring awe and bringing a touch of the exotic right to your doorstep. Embrace the process, and prepare to be amazed by the incredible beauty and scale of these tropical giants.